Showing posts with label composition. Show all posts

Monday, February 13, 2012

Tip #90: How to Hold Your Camera

How do you hold your camera? Does it make a difference? With point-and-shoots you nearly always see folks holding their cameras at arm's length and squinting to get the right composition with LCD screen on the back of the camera. You see smartphone users trying to wobble and move their camera into just the right position for a less than good shot. Incorrectly holding a DSLR with a long, heavy lens will not create the best of shots. In fact, because DSLR's are heavier, the extended-arm position will create many bad shots.

When I shoot, I look for ways to support both lens and body, and I try to tuck in my elbows to provide additional support. This self-portrait shows what I mean.


The more stable you can be, the better your shots will be. As with most things, these days, here's another article on the topic, http://improvephotography.com/1365/how-to-properly-hold-a-dslr-camera/.


Here's a video that goes into even more detail.


[Back to the Main Site]

Thursday, February 9, 2012

Tip #86: The Golden Ratio

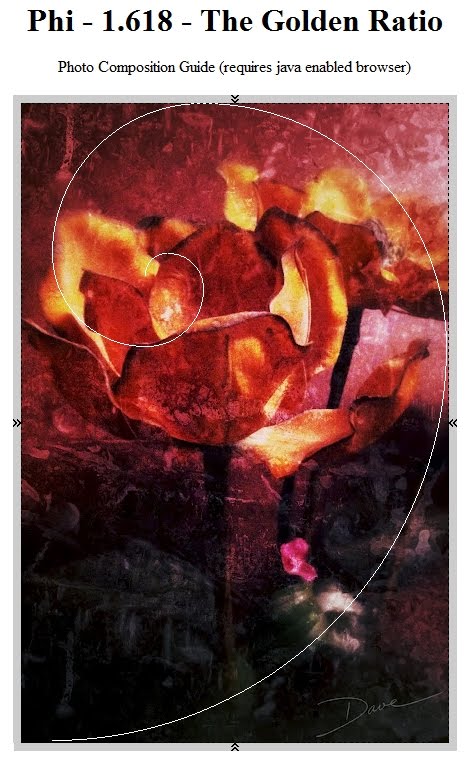
Have you ever had an image appeal to you, and you could not put your finger on the reason? There is some science behind that impression. Check out the article on the Golden Ratio. Whew, was that a tough read or what?

Seeing it is very much easier than reading about it. For example:


If you would like to investigate some of your own images, there's a site for that: dcolegrovephotography.com. Upload some of your shots, you may be surprised at how well your images measure up.


[Back to the Main Site]

Wednesday, February 8, 2012

Tip #85: Image Straightening

When it comes to straightening photos, I think I have seen most of the user interfaces for completing the task. There are dialog boxes for entering a number of degrees; there are grids to align; there are twirly things to click and rotate; there are sliders; and there are lines to draw.

In my opinion, drawing a line on either a crooked horizon or a vertical edge that needs straightening is about the simplest of the user interfaces. In Capture NX2 that is the technique that I use. Here are the before and after images of my editor in action.


Presto change-o! no muss, no fuss.

Note: Just so you know, I exaggerated the angle in the "before" image to make the point clear. My actual adjustment to the horizon in the original photo was less than a degree.


[Back to the Main Site]

Thursday, February 2, 2012

Tip #79: Break the Rules

Remember the tip that suggested the "Rule of Thirds?" Well, I am here to tell you that by knowing the rule, you are now free to break it. What? That's right, rules in photography are not really rules, rather they are guidelines to help you develop your skills.

Freedom is a powerful thing. Be creative with your art but be responsible!


[Back to the Main Site]

Sunday, January 1, 2012

Tip #47: Group Shots

Happy
New Year!


What do you do, when you have to shoot groups of people? One pro told me that he hires someone to pose and take group shots. He said it was less stressful on his clients.

There are a couple of quick remedies for taking group shots -- avoid long straight lines of eyes and make sure the person that is paying is in focus. Think triangles or clusters of three faces, and you will avoid the eyes-on-a-line problem. Keeping everyone in focus can usually be achieved by using small f-stops, such as f/8 or maybe even f/11, if there is adequate light.


Happy
New Year!


[Back to the Main Site]

Monday, December 26, 2011

Tip #41: Down the Road

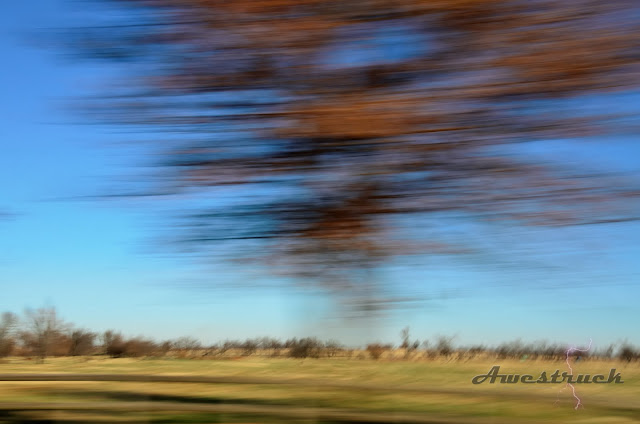
So, you're stuffed like a turkey, you are the passenger in a moving vehicle -- don't attempt this tip while driving -- and you have your new camera in your lap. You have fiddled with all the controls, you have composed your best shots, you are planning to add a little contrast in post-processing, now what? Here's something new to try.

Set your camera to aperture priority, A for Nikon, AV for Canon. Set the f-stop to f/16 or f/22, set focus to auto or infinity. Now, while moving at somewhere between the posted limit and your comfortable speed, roll down the passenger window and point your camera at the scenery, passing by. As you pass a clump of bushes or stand of trees, without looking through the view finder, click off a few shots. You will get something like this:


My inspiration for this technique came from a guest blogger on Scott Kelby's site, http://www.scottkelby.com/blog/2010/archives/12896. Take a look, and like me, maybe you will be inspired to try something new.


[Back to the Main Site]

Thursday, December 22, 2011

Tip #37: On the Horizon

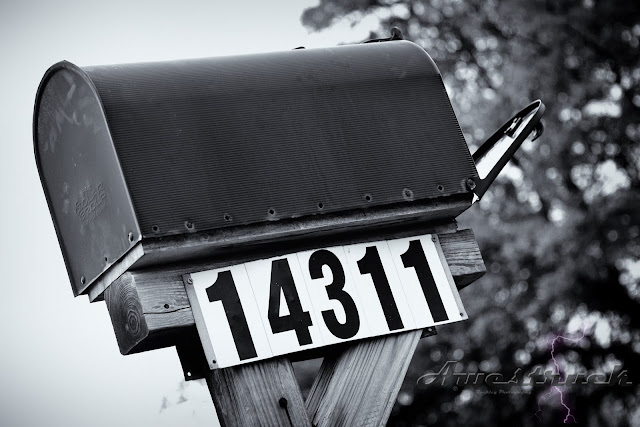
Generally, when composing images, natural horizons and vertical references should be on the level and up-and-up, unless you are making a dramatic, creative statement that involves a tilted subject. Here's a second opinion.


[Back to the Main Site]

Sunday, December 18, 2011

Tip #33: Portraits

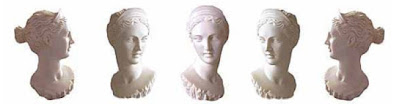
Let's be candid. Most photos that we take are candids. They are spur of the moment captures of the folks around us. Portraits on the other hand are carefully posed and designed to make the subject look good.


There are five classic feminine poses: profile left, profile right, 3/4 right, 3/4 left, and full-face. Masculine poses fall into the same categories but are set up to emphasize strength. The primary differences in the two styles are head tilt and feet placement. Feminine poses are generally S-poses, while masculine poses are C-poses. Women can be posed in either, while S-poses may be too soft for men.


[Back to the Main Site]

Thursday, December 8, 2011

Tip #23: Cropping for Prints

In a previous tip, I wrote on cropping people. Photos often need to be cropped for display or printing, too. There are the typical sizes that we a familiar with: 4x6, 8x10, 11x13, 16x20, etc. Square formats are also trending, now.


If you know you are going to be cropping for a special size, fill the frame, when you compose the shot, but remember to leave enough negative space for your final, planned output.

For the web, most anything goes. I typically use a 2x3 or 3x2 width to height ratio, but I do mix it up for variety. Panoramas tend to be wider and have strange ratios, depending on the number of frames that I capture in a panorama. A Scott Kelby trick that I mimic is to use a 16x9 crop for a cinematic look.


[Back to the Main Site]

Sunday, December 4, 2011

Tip #19: What about Zoom

There are three types of zoom that you may encounter. I highly recommend two of them and want share a caution about the third. Zoom is the process that gets us closer to our subjects.

The first is human zoom. This is where the photographer uses their feet to get closer to the subject. This works well when the subject is friendly and does not attempt to flee upon detection of a camera. Fleeing is common to teenagers and other wild animals.

The second type of zoom comes in the form of telephoto lenses. These lens allow the photographer to get really close to the subject, sometimes without being detected. Zoom lenses come in a variety of focal lengths. You choose the focal length that works well for what you are doing. For instance, wide angle zoom works well for landscapes; mid-range zooms work well for walk-around photography; and long zoom lenses work well for many things, including portraits and wildlife photography. Each class of zoom lenses have their sweet spots and shortcomings. Sharpness, distortion and price are often trade-offs that must be considered. I use a couple of lenses that that cover a long range of focal lengths, 18 to 200 mm and 28 to 300 mm. The flexibility of these lenses offer a lot of freedom, but some distortion is the penalty that I pay. Fortunately, the software I use has built-in corrections for lenses that I use, and if necessary, I can correct most of the distortion with a mouse click.

The third type of zoom, which I recommend against, is digital zoom. Digital zoom could more appropriately be called digital crop, because that is exactly what happens in the camera. As you adjust the digital zoom on the camera, the camera is actually cropping the image captured by the sensor and throwing away part of the detail. The effect is an image that appears magnified but is actually just a portion of the image's data spread out wider on the viewer screen. To overcome digital zoom shortcomings, I recommend using human zoom to capture the image or use the cropping capabilities, found in your post processing software.


[Back to the Main Site]

Friday, December 2, 2011

Tip #17: Take Pictures

Practice makes perfect, so here we go.

This tip is an audience participation tip. Choose a subject, any ol' subject, and take 25 shots of that object. Try different camera settings, use flash, don't use flash, daytime, nighttime, try different angles, up close and not so close, just take photos of your one chosen subject. Then, choose the best shot of your collection of 25, and send it to me, along with a short description of what you learned from the exercise. I will build a gallery of our images with descriptions for everyone to enjoy.

Send your photos to dave@awestruck-images.com.

To practice what I teach, I will take my 25, too. Happy Shooting!

Click here to visit Shoot-25 gallery.


[Back to the Main Site]

Wednesday, November 30, 2011

Tip #15: Golden Hours

The golden or magic hours in photography are the hour after sunrise and the hour before sunset. Warm beautiful colors become available from the less direct light from the sun. Shadows appear and add depth to the scenery. The warm light seems to wrap around everything. Artificial lights are not necessary, and skin tones tend to have a golden glow. The times are great for everything from portraits to landscapes to surreal silhouettes. Here's one of my favorite golden hour shots:


[Back to the Main Site]

Tuesday, November 29, 2011

Tip #14: Cropping People

First of all what is cropping. Cropping is the process of aligning the good bits and removing the bad bits or clutter out of a picture. Cropping can be done in the view finder - the preferred method - or in post processing with photo editing software.

Is it OK to crop people? Of course it is, as long as you crop them in interesting ways. Generally speaking, when you crop people avoid natural joints. That is, don't put the edge of your photo at a wrist, ankle, elbow, knee, or shoulder joint. Don't chop off toes or fingers and certainly avoid the neck. Loose heads are just not pleasant.

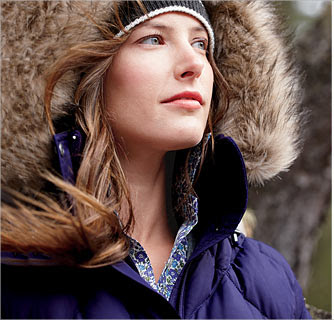
How about the top of the head? This crop is a bit controversial. An occasional crop of a hairstyle that adds little to a pretty face is OK. Some photographers never do this style of cropping, but you often see it in advertising:


Photo: Lands' End Online Catalog


[Back to the Main Site]

Wednesday, November 23, 2011

Tip #8: Keeping It in Perspective

Photographs by their nature are flat. As a photographer your goal is to add depth and interest to a flat medium. You do that with light, shadow, color, and interesting angles.

Light areas come to the foreground and shadows seem to recede. Reds move forward and blues recede. Finally, good diagonal lines add additional depth to your images. My example, using diagonals, is a field of flowers:


[Back to the Main Site]

Tuesday, November 22, 2011

Tip #7: Children

Have you ever noticed that many photos of kids are taken from the perspective of adults looking down on the child. A better way to go is to get down on the level of the child. Compose your shot and enjoy their expressions. This tip works for adults, too!

Here's an example -- kid level and bounced flash (Tip #6):


[Back to the Main Site]

Wednesday, November 16, 2011

Tip #1: Composing Better Photos

As you take a photo, mentally divide your image area (in the viewfinder or live view screen) into equal parts like a tic-tac-toe grid. Next, place your main subject at the intersection of two of the lines. Your pictures will instantly look better, if you compose your shots, using this rule of thirds. More...

Here's another web site with more on composition "rules".


[Back to the Main Site]