Showing posts with label editing. Show all posts

Tuesday, May 15, 2012

Tip #104: Circles -- How to Make Them

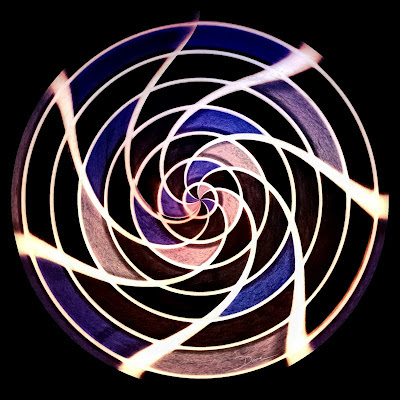
A new feature on my website is Circles. The technique has been around for a long time, but I had not played with it until just recently. Here's a quick sample.


Here's how I make them:
  1. I shoot ordinary subjects and look for colors that might work.
  2. I load the image into software that has Polar Coordinate filters, e.g. GIMP.
  3. I create a square crop.
  4. I convert the square crop to a circle with the Polar Coordinate filter.
  5. I apply the Whirl and Pinch filter or use iWarp or Liquify.

There you go. Let your eyes be the guide for the amount of pinch and whirl that you apply.

The example, above, was orginally a simple shot of small colored tiles with white grout.


[Back to the Main Site]

Sunday, February 12, 2012

Tip #89: Browser to Full Screen

In the old days (late 70's, early 80's), I shot a lot of slide film. I would go to the darkroom, develop the negatives, cut the film, and mount the individual slides into slide holders. Unless I was printing, I didn't look at the slides through an enlarger. Instead, I would sort the good from the bad using a back-lit slide viewer. The good ones would go into a slide tray and straight to the projector for enlarged viewing.

These days, digital images can be viewed as thumbnails in image editing software or as full screen images. Using ViewNX, the full screen view is just a double click away.


[Back to the Main Site]

Friday, February 10, 2012

Tip #87: Reusing Settings

Suppose you spend several minutes creating just the right effect for a photo, and say that you have other photos from the same shoot. Wouldn't it be nice to be able to apply the same settings to another photo? Capture NX2 allows this (as do other editors). Here are examples, showing how it can be done in NX2.

Get the settings just right:


Save the settings:


Apply settings on a different photo:


This feature is a definite time saver.


[Back to the Main Site]

Wednesday, February 8, 2012

Tip #85: Image Straightening

When it comes to straightening photos, I think I have seen most of the user interfaces for completing the task. There are dialog boxes for entering a number of degrees; there are grids to align; there are twirly things to click and rotate; there are sliders; and there are lines to draw.

In my opinion, drawing a line on either a crooked horizon or a vertical edge that needs straightening is about the simplest of the user interfaces. In Capture NX2 that is the technique that I use. Here are the before and after images of my editor in action.


Presto change-o! no muss, no fuss.

Note: Just so you know, I exaggerated the angle in the "before" image to make the point clear. My actual adjustment to the horizon in the original photo was less than a degree.


[Back to the Main Site]

Tuesday, February 7, 2012

Tip #84: Crop Tool

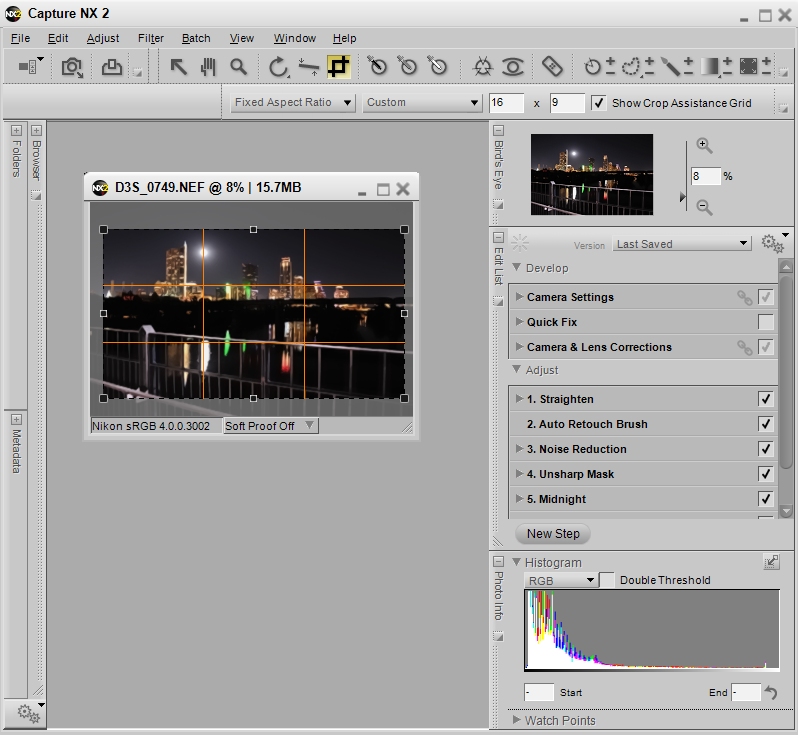
In Tips 14 and 23 I discussed cropping. This article will describe how the crop tool in Capture NX2 can be used to your advantage. The tool has two modes Free and Fixed Aspect ratio.


In Free, anything goes. You choose the shape of the rectangular crop.


In Fixed Aspect mode, the proportions of the sides are kept constant. You can choose popular ratios or set your own.


You can set the sides the same and create a square crop.


You can create a cinematic aspect by setting the sides to a 16x9 ratio.


Cropping should no longer be a mystery.


[Back to the Main Site]

Sunday, February 5, 2012

Tip #82: Sharpening

I was going to write a long article, explaining the in's and out's of photo sharpening, and how to use the Unsharp Mask. Thanks to the Internet, I found an excellent explanation that I happen to like. Check out Photojojo.com. If you are partial to Wikipedia, they have an article on the topic, too.


[Back to the Main Site]

Saturday, February 4, 2012

Tip #81: It's Noisy, Now What

It is rare that you take a photo and not have some noise present. There are all kinds of noise or speckles in photos. Removing noise is usually the first step in my editing workflow. Here's how I remove some of the noise, using the Capture NX2 editor.
  1. Load the image and zoom-in to 100% (CTRL-ALT-0 is the keyboard short-cut).
  2. Choose the Noise Reduction tool.
  3. Choose Better Quality method and Edge Noise Reduction.
  4. Leave the sharpness slider set on 5.
  5. Adjust the Intensity slider to the right just until the image noise is reduced.
  6. View the entire image (click on the hand icon).
  7. Continue with additional edits or save the image.


Before noise reduction:


After noise reduction:


[Back to the Main Site]

Friday, February 3, 2012

Tip #80: It's a Small World

On Saturday, I posted the following image -- a panorama on a sphere:


Yesterday, someone asked me how I did it. So, here goes.

  1. I shot a nine-frame panorama, overlapping each frame by about 20%. Any camera will work, but in this case I used one of my DSLR's. I took the images handheld, but a tripod might have been better. A full circle panorama might have been better for the spherical projection, but it is not a requirement.


  2. I stitched the 9 frames together with Microsoft ICE (Tip #34) and saved the new image.


  3. I loaded the panorama into GIMP. Photoshop would also have worked.


  4. I re-scaled the image proportions to a square (5000 pixels x 5000 pixels) with Image->Scale Image.


  5. I transformed the image with Filter->Distorts->Polar Coordinates


  6. I cleaned up my planet with a healing brush.


  7. I left the corners untouched for a dramatic round presentation on my black backgrounded blog.

  8. I saved the new image, naming it "Austeroid."

Text not enough? Here's a Youtube video that shows the Photoshop version of the transformation.


[Back to the Main Site]

Wednesday, February 1, 2012

Tip #78: Moving Pictures

No photographer's repertoire is complete without knowing a little about video. Why? Well, your customers are going to expect it, plus the technology is almost universal. I have it on my phone; I have it on a video camera; I have it in my DSLR's; I have it on the web -- video is everywhere.

There are free video editors on both PC's and Mac's; there are shareware video editors; and there are packages to buy. The price range is almost as varied as the sources of video, themselves. I use a consumer suite from Pinnacle software. It handles many input formats and can create output in most of the popular formats, including full HD.

Be prepared for a fairly steep learning curve. Fortunately, the duration of the curve is not too long. The effort will be worth it.


[Back to the Main Site]

Saturday, January 28, 2012

Tip #74: Simple Masks

We all wear them. They hide what we don't want seen. The same applies to photo composites -- images made up of more than one picture. Masks can be complex or simple. They can range from merging gradients or just shapes that block-off a portion of a picture. In a recent posting, I created a triptych, using three photos, a layer for each, a mask for each layer, and a background layer. My layers were named background, top, left, and right, so I could keep track of where the photos should be placed. Why all the trouble? Well, with the different layers and their masks, I can drop photos onto the different layers without disturbing the other parts of the image. It is like stacking the different images (layers) with restricted views (masks) of the different layers.

Here are the steps.

  1. Create basic layout.


  2. Create mask for each portion of the image, top, left, and right.


  3. Save the layers for use as a template, which can be rotated, enlarged, or used, as is, for future composites. This is usually the native file type, used by your editor; jpeg files do not save the layers, just the merged result.


  4. Add each image to its own layer.


  5. Add or change the background color with the flood fill tool.


  6. Save the final image, merging all the layers.


Note: This example was done with Paint Shop Pro, but the steps apply to whichever layers-capable editor that you might be using.


[Back to the Main Site]

Friday, January 27, 2012

Tip #73: Spot Removal

Technology has changed the way we edit photos. New improvements to editors have taken some of the pain away. For instance, spot and blemish removal used to require painstaking recoloring at the pixel level. Then, the clone stamp brush was created. With this tool you copied a small region of your photo, near the spot, and you copied the similar region to overlay the spot. Again, this was tedious at best.

Modern editors now have sophisticated improvements that remove spots with a single click. You adjust the size of the brush, click on the spot to be removed, and the tool blends the spot away. When you open your editor, look for retouching tools. For example:
  • In Google's Picasa the spot removal tool is called Retouch.

  • In Adobe's Photoshop the tool is called Spot Healing

  • In Adobe Lightroom the tool is Spot Removal

  • In Nikon's Capture NX2 the tool is Auto Retouch Brush

If you care to see sample tutorials, check out www.nikonusa.com or try the Lightroom tutorial.


[Back to the Main Site]

Monday, January 23, 2012

Tip #69: Use Picasa to Date-Stamp Your Photos

If you are sharing photos online or as prints and you want your audience to know the date or event, where the photos were taken, here's a quick how-to for adding a that information to your photos, using Picasa, the free photo editor from Google.

1. Open Picasa and go to your directory of choice:


2. Select the images to export:


3. Choose File | Export


4. Complete the Export dialog and click Export:


5. View the results:


Easy, huh?


[Back to the Main Site]

Thursday, January 19, 2012

Tip #65: Vignette, Oui, Oui

Oh Vignette, you are sassy and tart. Too much and you are obvious, too little and the eyes stray, but just right and you are so, so subtle. In photography, vignetting is the darkening of the outer edges of an image, so that the viewer's eyes are kept on the subject of the photograph. Done well, and the effect is barely noticeable. Done poorly and you have nothing but a dark circles around the edges of your images.

Here is an example of an exaggerated vignette. It is purposefully done poorly to identify the effect.


Here's an example that is a bit more subtle.


Here's the effect done just to my liking.


BTW, I used my main editor, Capture NX2, for these examples.


[Back to the Main Site]

Wednesday, January 18, 2012

Tip #64: Curves Tool

Most higher-end, image editing software has a powerful tool called curves. The mathematical nature of the tool seems intimidating, so some avoid trying it. In simple terms the curve(s) tool displays and allows changes to the relationship of input to output tonal values. Scary, huh? With the following examples, I hope to take the scary out.

When an image is first opened, the curves tool displays a straight-line relationship, overlaying the histogram of the image. In other words the input tonal values of an image matches the output tonal values. The following screen shot from Capture NX2 shows this relationship.


You can lighten an image by adjusting the far right slider on the bottom toward the middle.


You can darken an image by moving the far left slider on the bottom toward the middle.


For portraits, an S-curve is often used. Just click on the line and adjust it to form an s-shape.


You can create a negative of your image by moving and reversing the end points of the line, until you have a negative slope -- oops, there's some math, again.


You can even go psychedelic, if you make the curve perform unnatural acts.


Of course there are other examples. See more at Cambridge in Colour.


[Back to the Main Site]

Tuesday, January 17, 2012

Tip #63: Non-Destructive Edits

Choose your photo editor carefully. Better yet, understand what your editor does, when saving an image. Some editors are destructive, meaning when you make changes to an image and save the changes, the original image is overwritten. Unless you were working on a copy, the original file is now lost.

The Picasa editor, which I have mentioned in previous tips, makes a copy of the original file and stores it in a folder within the directory holding your images. That is fine and good until you choose to clean-up your files and delete the directory containing the original files. All is not lost, if you made a copy of your images in a another location.

Some image editors are non-destructive, meaning you can recover the original file. Capture NX2 is non-destructive. It actually saves the changes in the original file, if you are editing NEF (raw) files -- changes are not saved to jpeg or tiff files. Of course, I always have back-ups of my important images, just in case things go badly and files become corrupted.

Photoshop makes destructive edits, unless you do the smart thing and duplicate the original image layer with a new layer. Your edits should also be made with adjustment layers. Otherwise, you may lose details in the original image. See more on the topic at Photoshop Essentials.

If you find that your editor is completely destructive in nature, be sure to copy an image and save it with a new name, before you begin your edits. I recommend that you edit the copy, so that the original remains unchanged.


[Back to the Main Site]

Sunday, January 15, 2012

Tip #61: Reviewing and Tagging Photos

Not every photo that you take will be noteworthy, so you will need some way to score the images. In the workflow tip, I described my process for culling photos. Here's a bit more information. ViewNX 2 is the free software I use to do initial viewing and ranking. As I view each image, I click on a ranking button from 1 to 10. The ranking is stored in the image file and is available to my main editing software, Capture NX 2.


In simple terms a so-so image with no rank gets no attention during editing. A photo with a rank of at least three gets attention. For me, edited photos that have good potential for designation as "keeper" get higher ranks added during the editing process. As clients select photos for purchase, the rankings change, yet again.


These extra, ranking steps take almost no time to do, but they save me minutes to hours in the overall process of producing quality images.


[Back to the Main Site]

Saturday, January 14, 2012

Tip #60: A Funny Thing Happened on the Way to FB

A recent photo of mine has gathered many good comments. I appreciate the kind words and find them all encouraging. Regarding that photo, I want to tell you how I produced it and then follow-up on the interesting treatment that the photo has experienced. It's going to be a story much like lost luggage that comes home with more passport stamps than the owner.

First, here's the creation story. I was working in the darkened sound booth at my church, when I noticed the indirect light from the spotlight on the choir was creating soft shadows on my sound board. I sensed that the same light was softly lighting my face, so I set my iPhone on my knee, aimed the backside camera in the general direction of my face, and blindly snapped a shot. The result was a nice photo of the bulletin board behind me and about half my nose. I made a minor adjustment to camera placement and snapped another photo. This time I captured a grainy (low light) but well focused shot. Sound changes were coming up, so I pocketed my phone and went back to work.

When I got home I reviewed the daily images. The two-thirds self-portrait was an interesting shot, so I played around with it, using the Snapseed editor on my phone. I adjusted the contrast and added texture with the grunge filter, then I uploaded the photo to my PC. I fired up Capture NX2, loaded the image, and smoothed the excessive grain with a little noise reduction, then I brightened the entire image with a slight curves adjustment (more on that in a future tip). I finished the photo by adding my signature and copyright meta data. The resulting image is what I posted on Awestruck-Images, and later on Facebook.


The second half of the story is still a bit of a mystery. I have an idea of what happened, but I cannot confirm it. I posted the image in the usual way by posting a link to Awestruck-Images. I've been using that technique, successfully, since my early days on Facebook. The image thumbnail appeared as usual and the linked image stayed view-able on Facebook, long enough for folks to comment and "like" it. A couple of days later, the photo just disappeared from my timeline. I shrugged and attempted to reload the link. The image simply would not load. Again, I shrugged. I tried a different photo -- success. I tried the self-portrait, again -- failure. I tried posting the image directly to my wall -- success. About three days later the original link to the image, the "likes", and the comments reappeared as mysteriously as it disappeared.

I suspect that my copyright meta data was spotted by FB internal scanners, causing the linked photo to be blocked. The mystery is, why did the photo reappear? I cannot fathom that the FB search engines are smart enough to reinstate a blocked photo. Furthermore, I cannot believe that a human being became involved -- there are just too many millions of photos being uploaded for that to happen. So, I will shrug, again, and contemplate this mystery, much as I contemplate belly button fuzz.

What are the lessons in this tip? Photos, like beauty, are in the eyes of the beholder. A grainy, splotchy photo can have as much impact as a super sharp, detail loaded image. I think we call the effect, art.

Secondly, as all of you know, FB is not a vault for artful treasure, rather it is the social media service that we all get to use for free. Just don't count the ads and data mining that FB is doing each time we log on.


Note: Links to the software I use are in Tips #13 and #35.


[Back to the Main Site]

Thursday, January 5, 2012

Tip #51: Skylight Filter

In yesterday's tip I reduced the noise from a pretty good photo. Today, I enhance the sunset in the same photo to make the image come alive. I got the idea of using the Skylight filter from Moose Peterson, renowned outdoor photographer.

With the image loaded in Capture NX2, I finished the edit by choosing the Skylight filter from the Color EFEX Pro 3 plug-ins that are integrated in my copy of Capture NX2. I liked the way the sunset went from drab to bright. Then, I added a second use of the same filter. The result was like magic. Tastes may vary on color intensity; however, the use of stacked filters is an idea that everyone can use.

Before Skylight Filter:


After Skylight Filter #1:


After Skylight Filter #2:


Now to reveal the finished edit, here's the photo before edits:

Photo -- Randy Wohlert (this was a self portrait -- camera sitting on a stump with a timer set)


And, here's the completed photo that I returned to my friend:

Edits -- Dave Rackley


[Back to the Main Site]
Wednesday, January 4, 2012

Tip #50: Noise Reduction

Except for a few special cases, I do not like noisy photographs -- you know, the grainy, speckled images that have taken over the social media sites of the world. I prefer clear, crisp images.

A friend recently asked me, if post-processing would help an image he had captured. Without even looking at the photo, I said yes. The first step in my editing workflow is noise reduction. Here's how I reduced the noise in my friend's photo:
  1. I loaded the image into Capture NX2.

  2. I zoomed to 100% and scrolled to a portion of the sky. The 100% zoom is critical for noise adjustments. The sky is where noise most often shows its ugly self.

  3. I chose the noise reduction tool, and I clicked on "Better Quality" and "Edge Noise Reduction"

  4. In this case, I moved the slider to 27%, the point at which the noise melted away.

Before Noise Reduction (click the image for a closer look):


After Noise Reduction (click the image for a closer look):


I will be revisiting this image with a future tip, so stay tuned.


[Back to the Main Site]

Tuesday, December 27, 2011

Tip #42: Watermarks

This tip is a bit on the technical side. You will need software that can create and apply a transparent layer, such as Photoshop, Photoshop Elements, Paintshop, or other similar product.

A watermark is a "stamp" that is applied to a photograph to help indentify the owner of the photo. While it is not a perfect security system, it does make copyright infringement issues a bit easier. There are other means for photo identity security, and watermarks are just one method in my arsenal. You have probably seen my watermark -- images posted with the Awestruck-Images logo from my main web site, Awestruck Images.

I recently developed a new watermark that uses my signature. Here's how I did it.
  1. With a ballpoint pen, I autographed a plain white sheet of paper.

  2. I scanned the signature at high resolution (600 dots per inch). If you don't have a scanner, then just use your camera to capture the image.

  3. I loaded the resulting TIFF into my photo editor.

  4. I performed an edge-preserving-smooth operation on the image, twice.

  5. I performed a de-speckle operation to make the "signature" nice and dark.

  6. With a selection tool, I selected the different pieces of the signature and saved the signature as a transparent layer.


To use the new watermark, I load a photo to be edited, then I layer the watermark on top of the image. Because the watermark is it's own layer I can adjust its transparency or use the negative of the image as needed for differently colored photographs. When I am satisfied with the result, I merge the layers together and save the final image. An example of the new watermark is in Tip #38.


[Back to the Main Site]