Wednesday, November 30, 2011

Tip #15: Golden Hours

The golden or magic hours in photography are the hour after sunrise and the hour before sunset. Warm beautiful colors become available from the less direct light from the sun. Shadows appear and add depth to the scenery. The warm light seems to wrap around everything. Artificial lights are not necessary, and skin tones tend to have a golden glow. The times are great for everything from portraits to landscapes to surreal silhouettes. Here's one of my favorite golden hour shots:


[Back to the Main Site]

Tuesday, November 29, 2011

Tip #14: Cropping People

First of all what is cropping. Cropping is the process of aligning the good bits and removing the bad bits or clutter out of a picture. Cropping can be done in the view finder - the preferred method - or in post processing with photo editing software.

Is it OK to crop people? Of course it is, as long as you crop them in interesting ways. Generally speaking, when you crop people avoid natural joints. That is, don't put the edge of your photo at a wrist, ankle, elbow, knee, or shoulder joint. Don't chop off toes or fingers and certainly avoid the neck. Loose heads are just not pleasant.

How about the top of the head? This crop is a bit controversial. An occasional crop of a hairstyle that adds little to a pretty face is OK. Some photographers never do this style of cropping, but you often see it in advertising:


Photo: Lands' End Online Catalog


[Back to the Main Site]

Monday, November 28, 2011

Tip #13: What I Use

In previous posts I have written, generically, about photo editing software. In this tip I will describe the software that I use.

Since I shoot Nikon cameras in raw mode, I searched for software that would specifically work well with Nikon raw files. For full-screen viewing and basic edits, I use ViewNX 2. This software came with my camera and works with jpeg and raw file types. You can download it for free at Nikon.

The Nikon web site also recommended Capture NX 2 for more extensive edits. This software uses a remarkable technology from Nik Software, called upoint. During a photography trade show, I was introduced to other Nik software tools, namely Color Efex Pro, Silver Efex Pro, and HDR Efex Pro. I purchased each of these software packages and use them on a near daily basis. You can learn more at Nik Software.

For simple compositing tasks, I use an old copy of Paint Shop Pro. I have been using this software since my early web design days. There are newer versions, but I manage to get by with version 7, since it provides the capabilities that I use. [Update] I have upgraded to PSP X5. The user interface is vastly improved and memory management is much better. I needed the new functionality to handle the very large images that I typically edit. The old version would not correctly display the large files.

For panoramas, I use Microsoft ICE. This software is free and does an amazing job of stitching multiple images together. It handles lighting changes across the scene better than other paid-for packages that I have tried. You can find it at Microsoft.

Finally, I use Google's Picasa software for uploading family snapshots to web albums. Picasa also has bulk photo processing capabilities for tasks like resizing and adding a watermark to a collection of photos. You can download this free tool at Google.

[Update 2014] In January 2014, I began using Adobe Lightroom 5. Lightroom is now the first step in my digital workflow. It catalogs, it edits, it exports, and it allows publication in various formats. My other software integrates nicely within the workflow. With Lightroom, I can also automate repetitive tasks that were either disjoint or missing from the other software packages. I resisted for a long time; now I am a believer!


[Back to the Main Site]

Sunday, November 27, 2011

Tip #12: Who to Follow

If you are reading this, then you know there must be more. I follow several photographers and consider them mentors. They may not know me, but I know them and their work. On my main site, Awestruck Images, I list several links to other photographers. The list ranges from pros who write books and teach to those that have taken family photos of me and mine. I have learned something from them all.

You can find the links on the right hand side of the main page just below the posting archive.


[Back to the Main Site]

Saturday, November 26, 2011

Tip #11: Share It

Share your work. There are many ways to share the art that you have so carefully crafted. You can use Facebook, create a blog, build a web site, use a photo sharing site like flickr or picasa or one of many others. Most home printers do a pretty good job in their photo mode, when you use photo paper.  Let folks see your photography. They will enjoy it, so will you.


[Back to the Main Site]

Friday, November 25, 2011

Tip #10: File Formats

"I Shoot RAW" is Jared Polin's tag line. Raw is also the file format that I shoot on my cameras. The raw format is essentially a dump of the sensor after a photo is taken. Raw files contain the maximum amount of information available for a given image; however, raw files do require post processing, using software that understands the raw format for a given camera.

There are countless discussions in online forums on the pros and cons of raw versus jpeg. The bottom line is that there are appropriate times to use both formats. I choose to shoot raw, because I enjoy the post processing aspect of my photography. If I had to get photos moved quickly from my camera to a wire service, then I would use the jpeg format. When cameras allow it, many pros will shoot both formats simultaneously.

If photo processing is not your cup of tea, then by all means stick with the web standard, jpeg format for easy posting of your images.


[Back to the Main Site]

Thursday, November 24, 2011

Tip #9: Editing 101

What does it mean to edit a photo? It could be as simple as cropping or straightening or adding a little contrast. It could be as complex as merging multiple images into a single, composite image. Editing is where you fix minor flaws or perform complex retouching for a portrait.

To do editing you have to have software that allows you to make changes to the image captured by the camera. Some cameras allow you to do simple edits within the camera. More complex editing will require additional software. Photo editing software is a wide spectrum of products, ranging in price from free to very expensive. There is software that comes from your camera manufacture and third-party suites of software. There are apps that run on your smartphone, and there are web-based photo editors.

I use a wide range of software and software tools to edit photos. I suggest you try a few before you buy anything. Most software packages can be downloaded for a limited trial. A surprisingly good free package is available from Google, called Picasa. This package allows simple edits, has automatic photo correction features, and allows you to easily upload your photos to a free web album. Most importantly, the software allows you to experiment with changes that may make your images come alive.

The download site for Picasa is http://picasa.google.com/

Happy Thanksgiving!


[Back to the Main Site]

Wednesday, November 23, 2011

Tip #8: Keeping It in Perspective

Photographs by their nature are flat. As a photographer your goal is to add depth and interest to a flat medium. You do that with light, shadow, color, and interesting angles.

Light areas come to the foreground and shadows seem to recede. Reds move forward and blues recede. Finally, good diagonal lines add additional depth to your images. My example, using diagonals, is a field of flowers:


[Back to the Main Site]

Tuesday, November 22, 2011

Tip #7: Children

Have you ever noticed that many photos of kids are taken from the perspective of adults looking down on the child. A better way to go is to get down on the level of the child. Compose your shot and enjoy their expressions. This tip works for adults, too!

Here's an example -- kid level and bounced flash (Tip #6):


[Back to the Main Site]

Monday, November 21, 2011

Tip #6: On-Camera Flash

Additional lighting may be necessary in a dimly lit room or as fill-flash for a back-lit scene. The camera's flash can provide that extra kick. The problem with on-camera flash is that the light is harsh and is pointed directly into the eyes of the folks you are shooting. The light reflected from the retinas of your subjects creates that awful effect, called red-eye. If your camera has a hot-shoe mount, then purchasing an external flash with a pivoting head will let you bounce the light off a ceiling and onto your subjects, avoiding the direct reflection from the eyes and thereby eliminating the red-eye effect.


[Back to the Main Site]

Sunday, November 20, 2011

Tip #5: Camera Controls

Right out of the box most cameras are set to AUTO. This is so most of us can charge a battery, insert a memory card, and start taking pictures. You may get a few good pictures, but none will really jump out at you. Why? Well the reason is, AUTO could have been labeled AVERAGE, because that's what the camera does. It averages most settngs for the ambient conditions. AUTO even activates the on-camera flash, if it thinks it is necessary. Your camera may have other presets for different scenes, e.g. portrait, landscape, flower, night-time portrait, etc. These scene modes are actually sets of aperture, shutter speed, and ISO settings for different ambient conditions. If you have a DSLR, you probably also have the modes, P, A, S, and M.

P is program mode, meaning you may adjust a setting and the others will be calculated. By default flash is usually turned off in this mode. This mode is a good one, if you are out walking around in changing light conditions.

A is aperture priority. You set the aperture and the shutter speed is calculated for you. Flash is off, unless you specifically turn it on.

S is shutter priority. You set the shutter speed and the aperture is calculated for you. Flash is off, unless you turn it on.

M is manual. Here, you get to set aperture and shutter speed. In any of these modes ISO can be automatic or manually set, depending on how your camera is set up.

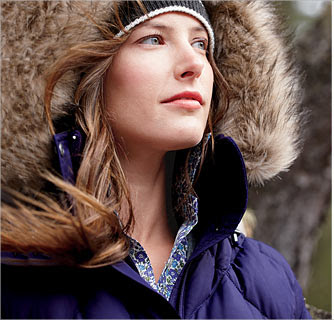
Ninety percent of my shooting is done in A-mode, so I can control the depth of field -- I like a nice bokeh (out of focus area behind my subject). Another small percentage is shot in S-mode, so I can freeze the action at 1/1000 of a second or faster. The balance is shot in manual mode. If you are shooting in AUTO, then my tip is to try some of the other modes. Experiment a little. You may like the results.


[Back to the Main Site]

Saturday, November 19, 2011

Tip #4: Exposure

This tip is to set the ground work for future, more technical tips. I also hope to take the mystery out of some of the jargon that goes with the photography hobby. There are three key ingredients to decent exposure (as opposed to indecent exposure) – aperture, shutter speed, and light sensitivity.
  • Aperture is the size of the opening in your camera lens that allows light to enter. The aperture mechanism works like the iris of your eye, opening and closing to allow more or less light to enter the camera. The size of the opening is referred to as f-stop and is marked as fractions, e.g. 1/1.4, 1/5.6, 1/22 -- the smaller the fraction, the smaller the opening. Lenses vary in f-stop capability. A lens that opens up to f-1.4 is considered a fast lens, while f-5.6 is considered slower. More...

  • Shutter speed is the measure of how long light is allowed to enter the camera. You can think of a shutter working similarly to an eyelid blink. The faster the blink the shorter amount of time light comes into the camera. Common shutter speeds are 1/60, 1/500, and 1/1000 of a second.

  • Light sensitivity, measured as an ISO rating, is an indication of how your camera responds to the light that is captured. A higher ISO rating means higher sensitivity. With the higher sensitivity comes another trade-off, called noise. Noise shows up as “speckles” in your pictures. Use very high ISO settings only when necessary.

The nearly endless combinations of aperture setting, shutter speed, and ISO affect how your camera captures an image. Along with your composition, distance to your subject, and type of lens these three attributes help you create the mood and, most importantly, the exposure for your photograph. Fortunately for you and me, modern cameras can automatically determine these settings. Most cameras offer a choice of settings or scenes for the different kinds of pictures we shoot, and higher end cameras allow us to make adjustments to one or more of these settings to capture the perfect image.


[Back to the Main Site]

Friday, November 18, 2011

Tip #3: Getting Organized

Getting photos out of the camera seems to be a problem for some. It also seems that every camera manufacturer supplies a special program to move and organize your photos. There are even special, third-party applications that claim to know better ways to manage your stuff than you do. I am very picky about my photo storage, and none of the applications I have tried let me do it my way.

I choose simplicity and repeatability. I like to create folders according to date and event and move the photos from the camera to those folders (directories). My preferred method of moving photos is to pull the memory card out of the camera and use a card reader that is attached to a USB port. I simply treat the card reader as another disk drive on my computer and copy the photos from the memory card folder to a newly created folder on my computer. The second method is to use a cable supplied by the camera manufacturer and connect the camera directly to my computer. I rarely use the second method, because the transfer process consumes camera battery power. My naming convention for new folders is straight forward. I create a parent folder named for the year, e.g. 2011, then I create subfolders for each photo shoot by date and event, e.g. 11-18-Smith-Wedding. The process works for me.


[Back to the Main Site]

Thursday, November 17, 2011

Tip #2: Getting the Most Detail

To capture the most detail, set your camera to use the highest resolution possible. Some cameras call this image size, because the trade-off for more detail is larger files. You may need extra memory cards or larger ones. When you share these larger, better images, you may have to resize them for easy emailing, but that is for another day.


[Back to the Main Site]

Wednesday, November 16, 2011

Tip #1: Composing Better Photos

As you take a photo, mentally divide your image area (in the viewfinder or live view screen) into equal parts like a tic-tac-toe grid. Next, place your main subject at the intersection of two of the lines. Your pictures will instantly look better, if you compose your shots, using this rule of thirds. More...

Here's another web site with more on composition "rules".


[Back to the Main Site]